


How to Install Iron Balusters
Posted by Railing Pro on Dec 1st 2024
Once you've finalized your design and selection, the next step is installation. Installing iron balusters can be a straightforward DIY project, especially with the right tools and preparation.
Understanding Iron Balusters
Twenty years ago, most iron balusters were solid metal, but due to rising freight costs and the popularity of geometric designs, tubular iron balusters have become the standard. Tubular balusters are much easier to cut, making them ideal for DIY installation. Most iron balusters are 44 inches long, and we provide a free baluster installation guide for reference.
Cutting Iron Balusters
On average, four different lengths are required for a staircase:
-
Balcony balusters
-
Volute or Start-Step balusters
-
Front (nose), Middle, and Rear balusters for steps
-
Angle Wall balusters (shorter, approx. 29 inches)
Recommended Cutting Tools:
-
For Tubular Iron: Use a wood miter saw fitted with a 10-inch metal cutting blade (available at Stair Solution or local hardware stores for under $10). Cutting takes just a few seconds.
-
For Solid Iron: A band saw (circular hack saw) or commercial-grade cutting equipment is recommended. Some metal types (like stainless steel) take longer to cut.
Removing Existing Wood Spindles
If this is your first time replacing balusters, start with the Balcony area for practice.
Step-by-Step Removal:
-
Use a jigsaw to cut each wood baluster at the lower portion (near the hourglass shape).
-
Hold the baluster with your free hand while cutting to prevent it from falling.
-
Identify the builder’s installation method (glue, nails, staples, or large nails) and adjust your removal process accordingly.
-
Check hole dimensions:
-
Bottom hole depth: No deeper than 1/2 inch
-
Handrail hole width: 3/4" to 11/16"
-
Handrail hole depth: 1-1/2 inches
-
Correct Baluster Placement
Many people assume the nipple at the end of the baluster should go into the handrail, but this is incorrect—the nipple is part of the manufacturing process.
-
For balcony installations, place the nipple down into the bottom hole.
-
The ornament should align in the center between the handrail and bottom tread, requiring only one cut per baluster.
Final Installation Steps
Cutting the Iron Balusters
-
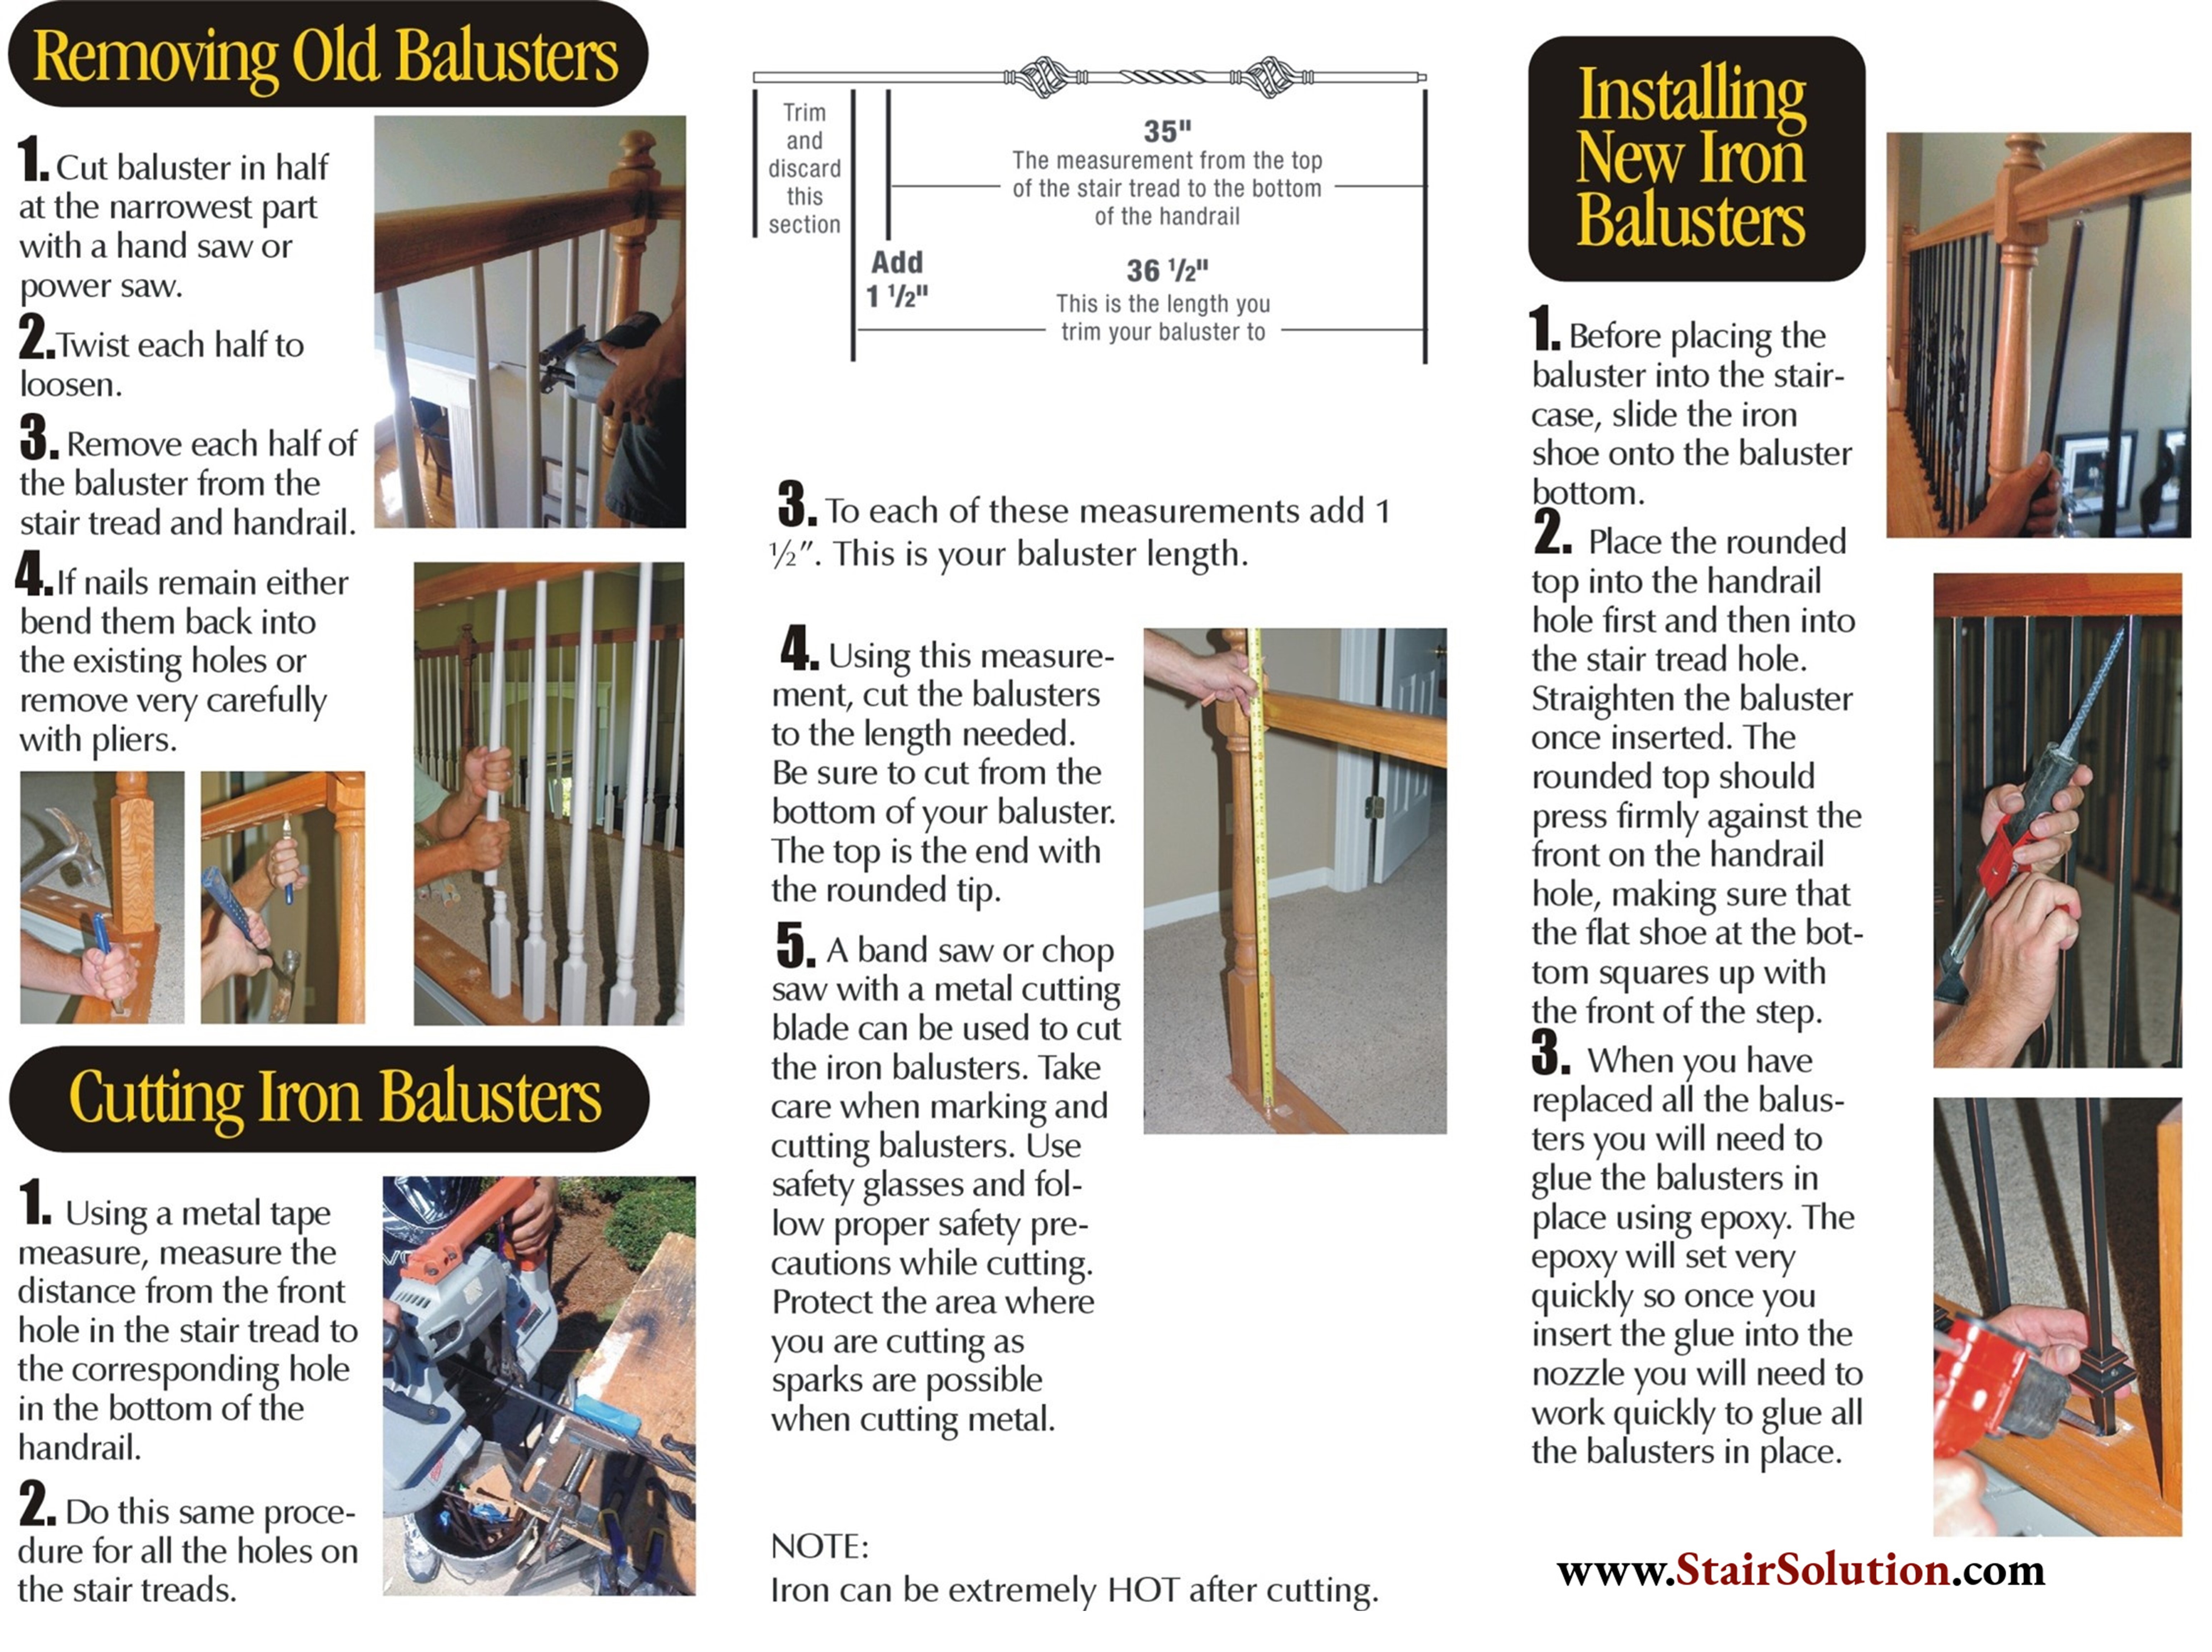
Measure the distance between the bottom nosing and the underside of the handrail.
-
Add 1-1/2 inches to the measurement.
-
Cut one baluster first to test the fit before cutting the rest.
-
If the fit is good, cut all remaining balusters for the Balcony area.
-
Install using Base Shoes for added stability.
Applying Adhesive
-
Use epoxy with a mixing tip to apply glue into the top hole first, then the bottom hole (including the Base Shoe).
-
Adjust each base shoe to ensure a flush fit.
-
Epoxy dries within 1-3 hours, depending on the type used.
-
Alternative adhesive: If epoxy is unavailable, use Loctite PL adhesive.
Shop High-Quality Iron Balusters
Looking for premium iron balusters? Browse our collection here and start your staircase transformation today!